Monday, July 13, 2015

Retro Challenge 2015/7 Update 2: Keyboard And Joysticks

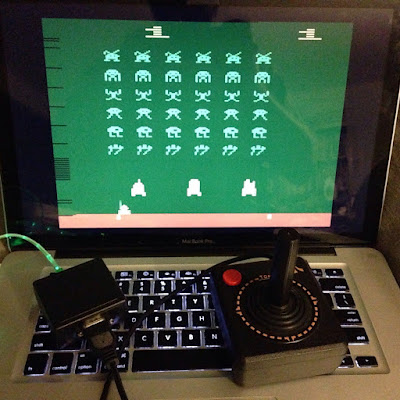
Space Invaders running in Stella on my Mac.  Jasper loved it!
(He also liked the green light-up USB cable.  That's my kid!)

As of last night, I have finished code for the joystick-to-keypress controller, as well as the ability to save the configuration in the EEPROM in the ATmega chip. As usual, the code is all available here on github.  What this basically means is that moving the joystick will send down keypress codes to the host computer... so the computer thinks that a keyboard is being used.  This means that applications like Stella, an Atari 2600 VCS emulator, which expect you to use the arrow keys and space bar in place of a real joystick, can see those key presses when you move your actual Atari joystick!

You can now pick from a list of keyboard mappings, including:

  • Stella (Atari 2600 emulator) (shown above)
  • Vice (Commodore 64 emulator)
  • Mame (Arcade game emulator)
  • WASD (general PC game usage)
  • HJKL (vi cursor movements (because why not!))

I have also implemented a basic settings system that saves settings to the EEPROM within the ATmega32u4 chip.  It currently has "slots" for a few things, but could be expanded with the above joystick-to-keyboard mapping, to send other keypresses from joystick movements or what have you.

The settings system works with 4 bytes in the EEPROM to determine what's going on with respect to saved settings. The first 3 bytes are a sentinel.  If the code does not read the sentinel, it will assume it's on a new device, and will install default values to the EEPROM.  The current sentinel are the three hex bytes: { 0x53, 0x44, 0x4c } which are the ASCII string "SDL", my initials. ;)  Next at setting slot [3] is the settings version number.  Currently this is just '1'.  Settings slot [4] contains the usage mode for the interface port. (Mouse/keyboard mapping, etc).

I attempted last week to get an Amiga Keyboard working with this.  I wired up an 8 position pin header to the interface board, using the Amiga 500 pinout:

  1. Data
  2. Clock
  3. Reset (toggled when Ctrl-A-A is pressed)
  4. +5v
  5. key (missing pin)
  6. Ground
  7. Status LED (power)
  8. In-Use LED (disk access)
I was going to just wire out the Data, Clock, +5 and ground but decided that it made more sense to use the actual A500 pinout. I ran into a problem on this though.  The interface can't provide enough power to drive the chips on the interface board.  I measured 4.5v at the pin header, then 3.2v down on the interface board itself.  This isn't good.  I will have to wire up a new interface connector with an external power connector, probably a USB-B jack, to provide dedicated power to the keyboard.

I did however find a phone being discarded, and retrieved the two 4P4C (RJ-22) connectors from it so that I can make a better A1000 keyboard jack.  The first one I made used an RJ-45 wall mount jack, which worked somewhat for RJ-22, but it was pretty hacked. ;)

Some thoughts for future additional expansion:

I'm currently going for the "cheap as chips" version of this, which is why there's no interface on it, and you have to connect via serial port to configure it.  This was all intentional to keep the build parts list down... to the point where the only necessary part is a D9 connector!  However, in using it, a few future revisions may offer more usability at the cost of parts expense:

  1. Multiple D9 jacks for multiple devices
    1. Ports dedicated for Mouse, Trackball, Multiple Joysticks, etc
    2. Could be just 2 that simulate Commodore/Amiga
    3. Could be 4 to simulate Atari 800 joystick ports
    4. Could be 1 for mouse, 5 for joysticks, so you never have to disconnect them.
    5. Would require a parallel-in, serial out shift register, or a port expander
    6. Expansion at the cost of a few cents, additional wiring, and time to read in the content
  2. (related) configuration for multiple ports
  3. User interface - Was thinking that this could be a variety of different methods:
    1. single pushbutton, Red/Green LED for indication codes (flashing colors)
    2. single or dual pushbutton, RGB color addressable LED for indication codes
      1. each could be wired directly to IO pins
    3. dual pushbutton, 7 segment LED display
      1. Could indicate use mode(s), etc
      2. 'C' for commodore mouse, 'A' for atari mouse
      3. '0'..'7' for joystick mode display
      4. Could flash multiple digits sequentially for info etc
      5. Would require LED driver chip
Obviously, all of these would require additional effort beyond the "let's get this working" and can be seen as stretch-stretch goals.  ;)


Tuesday, July 7, 2015

Retro Challenge 2015/7 - Amiga Mouse, Joystick, Keyboard USB interface

Once again, it is time for the Retro Challenge! This time around... well, I wasn't sure what I was going to work on,... In my "I want to partake" email, I listed projects such as working on an SD-card based storage drive for the KIM-Uno, my "Bare Metal C64" long term project.. which will likely wait until I retire, as well as working on the Interlock Homebrew Computer System.

Then I started to get parts from an aliexpress order that I placed.  I received my Arduino Pro Micro which is the teeny tiny version of the Arduino Leonardo.  What makes this special is that the main chip on it is the ATmega 32u4. This is the USB interface chip used in the Arduino Uno.  It has all of the standard IO of the 168/328, but with USB HID support.  This means that it can pretend to be a USB keyboard, mouse, etc.  This is a HUGE feature if you want to make standard computer peripherals.


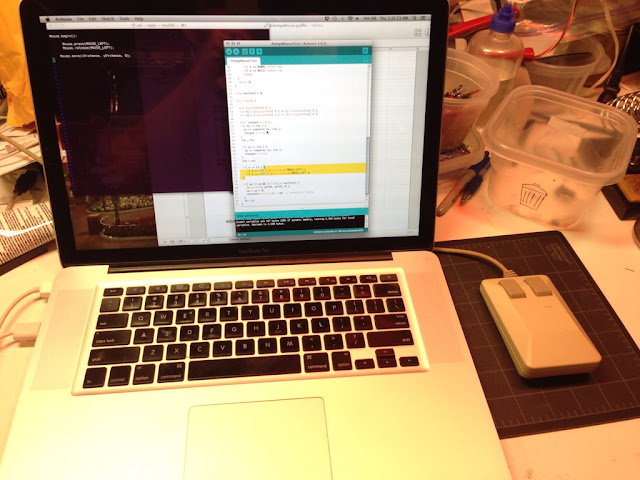
For some reason, it clicked that I wanted to make a USB HID interface for my Amiga mice.  Long story short, within an hour, I had a functional prototype. I was moving my Amiga mouse, and the cursor on my MacBook's screen was moving.

I figure that this will be great for using the Amiga emulators. It'll be nice to use an authentic mouse, joystick and maybe keyboard with UAE, Vice or just for fun for regular usage.  I know that there are other projects out there or products that do this kind of thing, but they're a bit pricey to have a widget that I can't expand or repurpose... and besides at its core, this is not really a difficult or expensive product.  The most expensive single part so far is the microcontroller, and that was $3.

A little background on the Amiga's mouse...

The way old optical ball mice work is that they have two rollers that sit on a weighted ball, one for the horizontal, and one for the vertical.  As the mouse moves horizontally, the horizontal roller moves, and the ball slips on the vertical one.  The rollers have an encoding wheel with little windows that make and break optical connections with a pair of sensors.  These two sensors generate two bits of data for each direction. (four total.)  These two rotary encoders generate a gray code quadrature output.

Movement in one direction outputs:  00  01  11 10  00
Movement in the other direction outputs: 00 10 11 01 00

So, if you read these in a tight loop, and detect changes you can detect movements in the horizontal and vertical directions. In the same loop, if you look at the button inputs, you can determine if the buttons are pressed.

This is the basis for this project.  By reading these values from a dumb (no internal processing) Amiga mouse, I can generate vertical and horizontal motion values.  I can then send these down the USB HID stack through the Arduino libraries, and voilĂ , we have an Amiga Mouse to HID USB mouse adapter.  NOTE: PS2 and ADB mice have more smarts in them and output movement deltas rather than optical sensor pulses.  Reading either of those requires serial communications and protocol decoding instead.

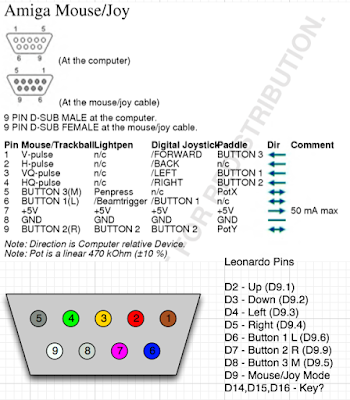
My cheat sheet for pinouts and connection information.


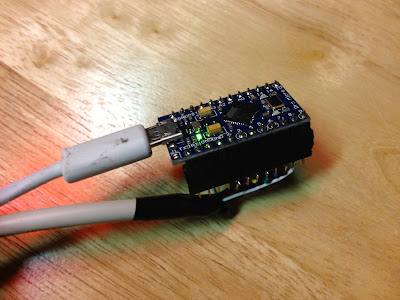
Within an hour of this brainstorm, I had this prototype:

Arduino Pro Micro (ATmega32u4), with headers and D9 cable attached.

Commodore Amiga mouse plugged into a spare serial cable re-used as a D9 cable.

Unfortunately, the serial cable I was using had all of the wires connected except for the line used for the right mouse button.  Oh well... For the "what's available on my desk" approach, it was good enough for a proof of concept.

From there, some simple acceleration was added to convert "quick" movements of the mouse to "large deltas" sent down as mouse movements...

The way I implemented acceleration was that each time through the loop, i check for Horizontal or Vertical ticks.  I store the ticks as +1, 0, or -1 in an array of the last 128 readings.  Then, I sum the entire 128 elements of each (horizontal and vertical) array, and use that as the mouse movement.  The faster the mouse is being moved, the more +1s or -1s there will be, so it sends a larger number.  It was a quick hack that I thought might work, that turned out to work perfectly!

Some upcoming additions that I might / probably will do:

- Atari ST Mouse Support.  The only difference between an Atari and Amiga mouse are that two of the lines (specifically D9 pins 1 and 4) are swapped. This is an easy change in software.  The difficult part is tracking down an Atari ST mouse to test with!

- Atari (Digital) Joystick Support.  By combining the button read code with the acceleration code hinted at above, I can convert Joystick movements to HID mouse movements

And really, from that point, it would be near trivial to add in HID keyboard support as well... I can send down WASD key presses for joystick movements... or really any other key presses based on joystick movements.

Additional features may include support for Amiga keyboards as HID keyboard, joystick as HID gamepad, etc.  In preparation for working with one of my old Amiga 1000 keyboards, I cleaned one up to get the years of finger grime of of it...

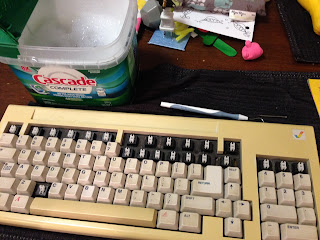
The right side has been cleaned using my proprietary cleaning technique described below.

Keyboard in the process of being cleaned. More like CLEANBOARD. HAHAHA. :(

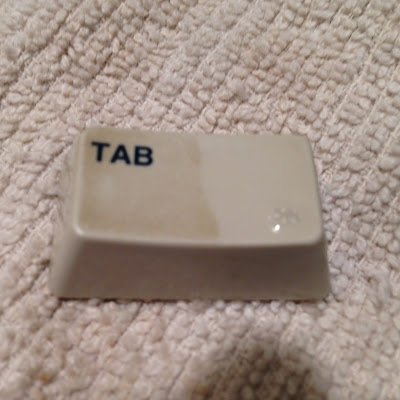
Here's the (yellowed) keyboard with some keys removed. (The 'X' key has been missing for years, sadly.)  The proprietary cleaning solution is in that "Cascade" container.  I would use that dental pick tool and my hand noodles to pop the keys off of the keyboard.  Then I dropped them into the cleaning solution.  After about 30 minutes, I pulled each one out, wiped it off with my fingers, rinsed it off, and they were as clean as new.  The proprietary cleaning solution is one squirt of dish soap with some warm water. ;)

NOTE: Not shown is the process of removing all of the lint, hair and other bits of whatever that were stuck between the keys because that's kinda gross and you don't really want to see that anyway..

More on this project to come...

I briefly explored the idea of supporting Mac/Apple IIgs ADB mouse and keyboard support, but I quickly learned the complexity of the ADB spec, and am putting that safely outside of the scope of this project!

The code for this project and other development details are available on github in the AmigaInputToUSB repository.

Post Backlog...

I've got a bunch of projects I've been working on here and there. I'm a bit behind with this.  That seems to be a theme.  I'll be putting up posts over time of various things...