Since I was a kid, I was always into Disney Imagineering. For many years, I always thought that designing and building attractions and such for them was something I would aspire to but never reach. I always held WED/WDI up on this pedestal, thinking that they were so far above me, and I'm sure that in some areas they are. Over time, I've come to realize that I can do that stuff too. I have always wanted to be an "Imagineer", and there's really nothing stopping me from becoming one... Perhaps I won't be working for Disney, but I can do the same stuff. That's where this project comes into play.
These birds sing words.
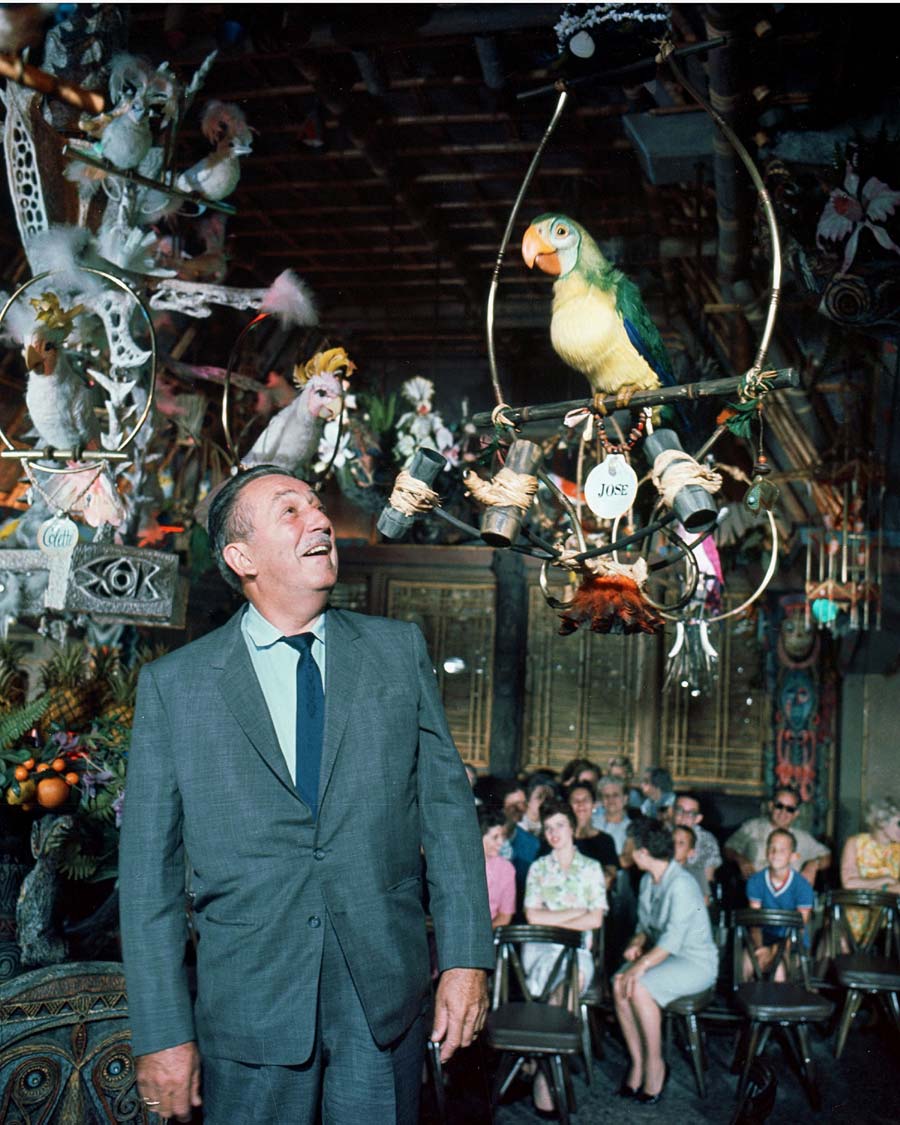
Disney introduced
The Enchanted Tiki Room in 1963, and it's probably my favorite attraction at Disneyland and The Magic Kingdom. It's got everything... Great music by the Sherman Brothers, wonderful island-tiki themes, humor, animatronic birds that sing words, flowers that croon... I've wanted to bring this home somehow, and I think that the time is right to make this happen. It's a really big project and will likely take me years to complete, but I'm sure that it will be a welcome addition to my son's playroom (and/or my office.)
These flowers croon.
The project covers a lot of subprojects. I'll try to outline here the various subprojects which I will be working on and blogging about here as I work on them. (I will list them here in arbitrary order, as I will be working on and posting about multiple projects simultaneously.)
My goal is to make this as repeatable/reproducible as possible. The things I make may be one-offs prototypes, but the goal is to make them easy to duplicate. I won't rely on specific items from stores, other than materials, and many of the parts I will either vacuform, 3D print, or craft. (Things like the MST3K bots relied on specific parts, which have become difficult to find, turning those components from "cheap old junk" into "collectible, rare, expensive parts". I hope to avoid this situation.) I also plan on doing this as inexpensively as possible without it becoming "cheap". I may offer kits, parts, downloads, templates for the various aspects of the projects in time as well. All of that will become clear to me while I work on this.
Looking around for items to purchase "out of the box" shows that a simple playback unit might cost $500, a servo controller $300... so that's $800 before you even buy a single material or piece of wire for it. The controller boards I'm going to use are Arduinos, at $22 each, and they will be controlled from my Mac computer, which I already have. I may consider automating this in the future, which will require further design consideration, but may be accomplishable via a Raspberry Pi $25 and a USB audio device ($5) I'm going for "in my house" not "industrial", although the concepts are the same.
Project 1: Vacuum Forming Rig
To construct the outer body of the birds in a quickly reproducible fashion, I've decided that it's time to build a simple vacuum forming rig. I will be building this at
Interlock, using some scrap material there, the vacuum there, and their heat gun. I can build a heating element rig too, but to get started i'll just use a heat gun. I plan on only making a 12" square working area (or perhaps a little smaller). I will be using this to make at least the beak of the animatronic bird, but probably also shells for the head and body, onto which feathers or fur can be added.
The idea is that I would make molds of these various parts, and then vacuform plastic sheets over the molds, cut them out, and I will have easily reproducible parts.
Here's a link to a video of something similar to what I want to build.
Project 2: "Walter" Motion Capture Hardware
The most intiuitive (and fun) way to capture the performance to play back on the puppet is to build a puppet motion capture system. I'm vaguely basing this design on
the "Waldo" rig that Jim Henson is demonstrating here. I may use a lot of PVC and CPVC parts to construct this, and perhaps some 3D printed parts. I'm not entirely sure yet. I will likely use simple adjustable resistors/potentiometers at the joints to capture the angular data, hooked up through an
Arduino's analog inputs, then recorded on a host computer. The test app for this will be a simple display that records motion events.
This is the one section of the project where I will likely only be building one, and will do a lot of hacks to get it working for my needs. If there is demand for it, I can figure out a way to reproduce it but that is not the goal for this section.
Project 3: "Elias" Motion Capture and Replay Software
This software, which I lovingly call "Elias", named after a certain guy who was quite influential, will work with project 2 above. It will play back an audio file, and log input from the puppet control Arduino in some yet to be defined data format. It will represent the angular information on the computer's display, while playing the audio. It will also be able to replay the angular information down through a target Arduino (in the future, embedded inside of each puppet), synchronized with the audio. This software could easily be re-purposed to control relays to turn on and off lights to make simple light shows and such. It will handle up to 7 analog tracks, and 7 digital tracks at a sample rate of somewhere around 500-1000 samples per second, capable of going over a 9600 baud connection. The first version of this will be used to drive my xmas lights this season.
Project 4: Flora Design and Construction
Here's where it starts getting REALLY fun. To start with, I will build a simple flower, possibly like the second image seen above. Those flowers have basically one point of articulation; just the mouth open or closed. I may add a second point, rotation of the entire flower. The flower petals will be vacuformed and spray painted. They will likely then be glued together to some sort of plastic armature. The mouth may be actuated via solenoid or something similar. The rotation, if implemented, will be made by directly mounting the lightweight flower puppet on a servo's control arms.
The goal of this isn't specifically to make an animatronic flower, although that will be one of the products of this, and will be needed for background/fill for my Tiki extravaganza. Rather, this will be a good way to integrate everything together, without constructing the complete avian, which will take significantly more time and effort to complete. Get something done quick, get another "win" under my belt, get motivation to follow through with the following item...
Project 5: Avian Design and Construction
Similarly to the flower, this will have a plastic or maybe foam-core skeleton which will hold the electronics and servos. For all birds, this skeleton will be identical. I'd love to make four birds, but one will be awesome. On top of the skeleton, vacuformed skin will be affixed somehow, perhaps using cotter pins like the hood on a remote control car, or perhaps using just Velcro. These skins will be painted and have feathers glued to them. I can picture this being made of seven pieces: left body, right body, belly, lower beak, upper beak. top of head, bottom of head. I'll have to figure this out further. I'll also have to figure out how to add the articulation points in the skeleton, as well as the best way to affix feathers, or a feather-like skin on them.
At this point, everything will be done, and I should be able to make a tiki bird performance!
Now that I've spelled this all out here, I feel a bit overwhelmed by the whole thing! ... but I have to admit, each item is achievable. I'm anxious to get to the final product!


