I am working on restoring/repairing a Macintosh SE/30 machine, and I'm at the point now where I'm debugging why SCSI isn't working on it anymore. I found some schematics for it online, as well as some troubleshooting guides. The project ahead of me was to 'buzz out' all 44 pins of the SCSI interface chip to points elsewhere on the board, to figure out why it's failing. I knew I'd need a good continuity tester for this. I have this feature in my multimeter, but I didn't want to hear that annoying beeper... I wanted a visual response instead.
I had toyed with the idea of using an LED Glow Stick flashlight, like I used for my "Sonic Screwdriver", just add in two wires going to test points. I swung by the auto parts store, and instead saw this there for $10:
I decided this was a good starting point. The light up portion was originally made for an incandescent screw-in type light bulb, but has been replaced by an LED, which doesn't work awesomely at glowing that end, and the alligator clip should be something a lot more precise, so those are the two things I decided to address.
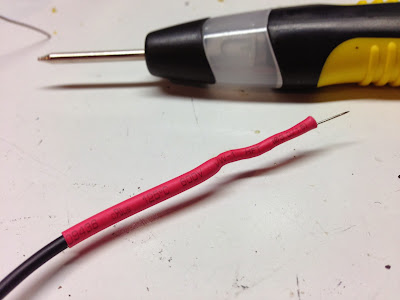
First thing that had to go was the alligator clip end. This is going to be touching into very fine-pitched electronics, so I needed something more precise.
The LED in it was a bit... lacking... So I added in a bit of reflection using some metal foil tape, to try to let it glow better when it's on too.
The end result is pretty simple, but very useful. That pin can really get onto any of the densely packed pins I need to test, and pierce through any oxide or muck on the joint.
Knowing now how easy it was to make the "probe" here, and how well it works, I think I might go back to my original idea of using an LED Glow Stick flashlight, and just tapping into the circuit to add in two probe wires, terminating in these pin probes. In retrospect, I already had everything I needed before I bought this thing. Heh!


I recently replaced all of the capacitors on my Macintosh LC and although I did not use it on that particular project, the device I use as a continuity tester is my multimeter. It has a diode tester which beeps when there is a connection through your diode, granted you have the anode and cathode correctly placed. Anyhow, when not testing diodes, it will beep when the probes touch.
ReplyDeleteThe LED is just as great an idea if of course you are in a loud atmosphere such as a car repair shop. I feel like the analogue output may not be sufficient enough if you were to locate a micro-short on a PCB. The short could be so very thin that it could create a resistance high enough so that the LED does not register bright enough for you to notice. With a multimeter, the output is either yes or no, and nowhere in between. Worse case scenario, yes, but considering how sensitive the devices we toy with are, I wouldn't chance it.
Yep. My multimeter has a tone/continuity tester, but I was going to be working on this very late at night, and didn't want to disturb those in my house that are asleep, so I went for a light.
ReplyDeleteI used the multimeter to test power, and diodes. (I assumed that all electrolytic caps were bad, so i replaced them). This thing is dark (NC), bright (Connected), and dim (through some component) Worked well enough for me. It helped me track down a broken trace and get the SCSI working again. :D
Excellent. Why not post about your whole process?
ReplyDeleteI thought I kinda did. If anything, I felt like I made this seem like a huge project with all of the pictures, when I really just hacked a pin probe onto the thing, and monkeyed with the LED. Or did you mean the restoration of the SE/30? Because that's coming in another post...
ReplyDeleteThe SE/30. I love to see inside these old computers.
ReplyDeleteLooking forward to it.
In easy layman's terms, resistance refers to the convenience of electrical flow, voltage references the number of electrical flow, and electrical phenomenon reflects the ability of electricity itself Garatools.com.
ReplyDelete